The five checks are written out below.
Captions available — press CC · Also on YouTube
You try to log in to your own website and WordPress says The username is not registered on this site. Or your domain is a week from expiring and the reminders have been going to someone who built the site years ago. That is usually the moment owners find out that the keys to their business's website sit with someone else.
You can find out today, while nothing is wrong, in about the time it takes to drink a coffee. There are five keys. For each one below you will see what to look at, what "yours" looks like, and what to ask for if it isn't. Every screen in the film and in this post is real, apart from the two that differ from company to company (the registrar's and the host's), which are drawn.
Why this goes wrong
Whoever set the site up created the accounts, and they usually created them with their own email address, because it was quicker. The domain was registered in their account, the WordPress login was theirs, the hosting was on their card. None of that matters while they answer the phone. It matters the day they don't: the domain's renewal reminders go to their inbox, WordPress's recovery-mode and critical-error emails go to their inbox, and the hosting account answers to whoever opened it.
ICANN's Security and Stability Advisory Committee gives businesses the same advice: put your business entity's contact details on the domain as the registrant, so the domain stays tied to the business. The same thinking applies to the other four keys.
Step 1: your domain
Your domain (yourbusiness.co.uk, yourbusiness.com) is registered with a company called the registrar. The person or business it is registered to is the registrant: in ICANN's words, the person or entity that holds the rights to the domain name. Start with a public lookup.
- Open ICANN's lookup tool and type your domain. Go to
lookup.icann.org, type your domain and press Lookup. (For a .uk domain, Nominet runs the lookup; its RDAP service replaces the old WHOIS, which ends on 9 February 2027.) - Read the registrar. Under Registrar Information, the name is the company your domain is registered with. That is where you will need a login.
- Read the expiration date. Under Dates, Registry Expiration is when the domain has to be renewed. Put it in your calendar.
- Look at the registrant. Under Contact Information it will often say REDACTED FOR PRIVACY. That is normal: since GDPR, registrars hide personal details in public lookups. So the lookup tells you where your domain is, not whose it is. Step 2 answers that.
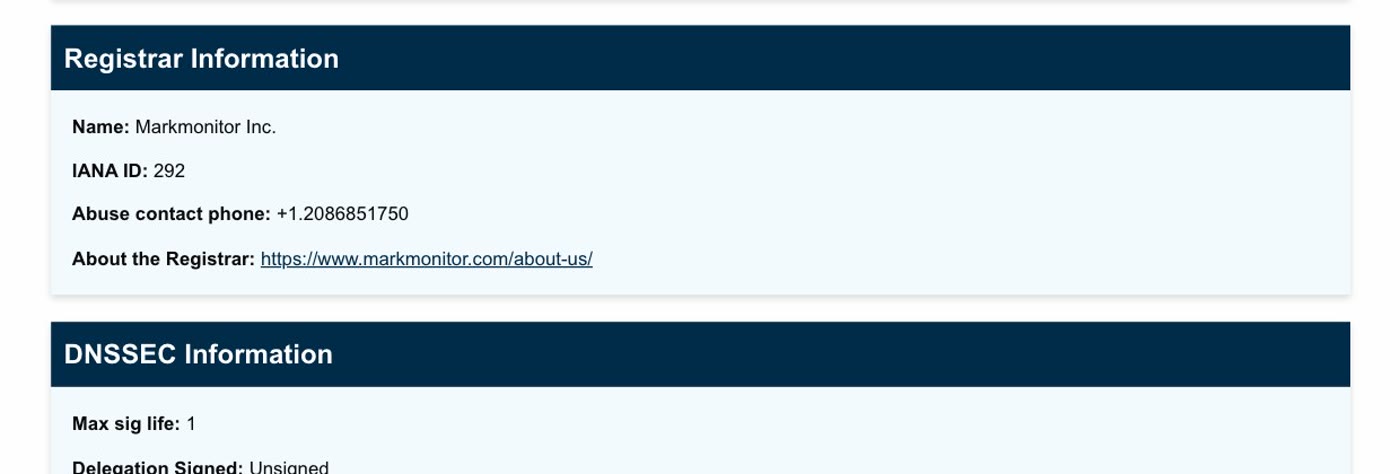
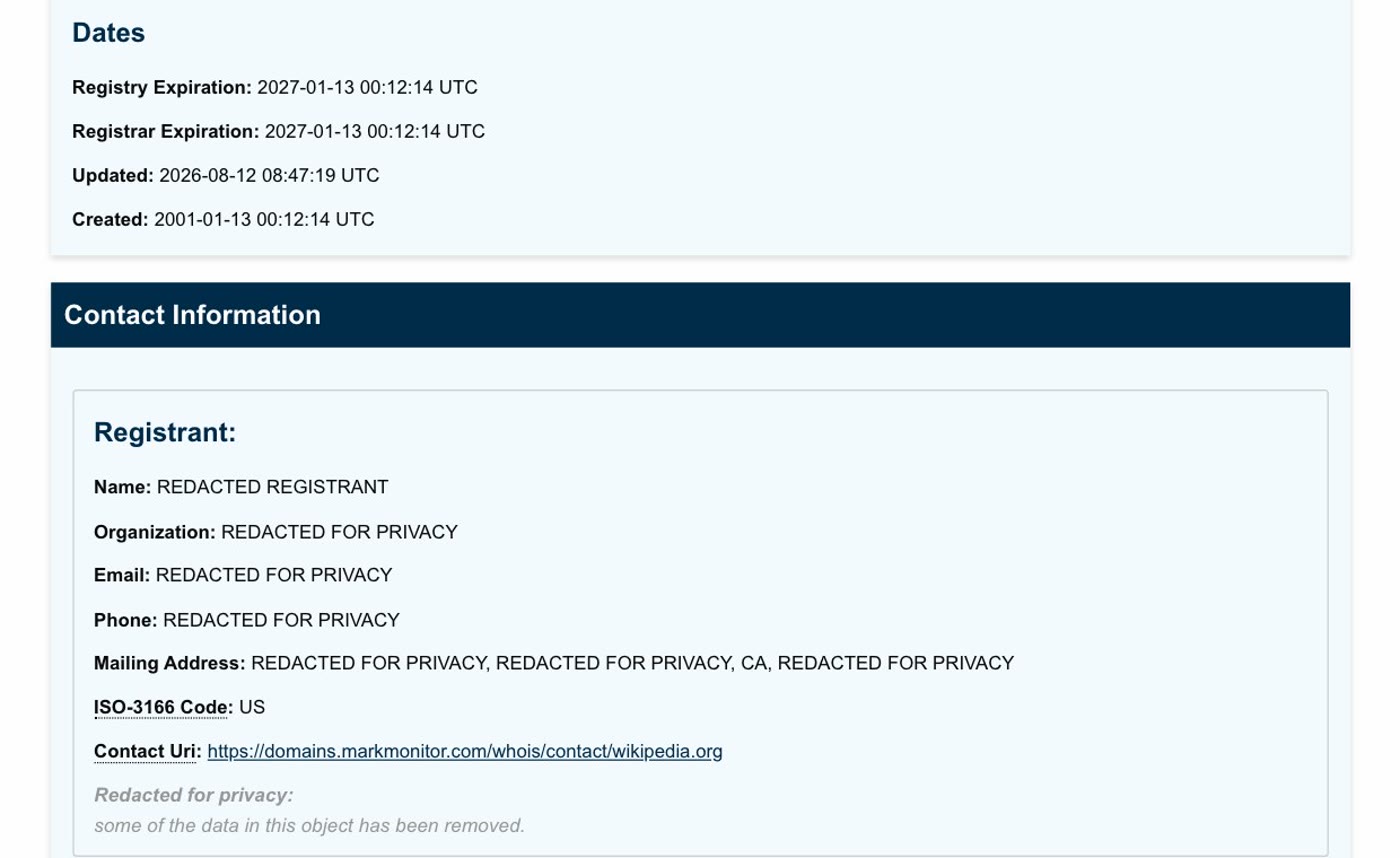
Why it matters: ICANN requires registrars to send at least two renewal reminders, about a month and about a week before the domain expires, and one more within five days after if it hasn't been renewed. They go to the registrant's contact details. If those belong to someone who has left, you never see them.
Step 2: the registrar account
Now log in at the registrar from step 1. Every registrar's screens look different, but you are looking for two things, usually on the domain's own page:
- The account is yours. The domain sits in an account in your own name (or your business's), and the login email is an address you read.
- The registrant is you or your business. The domain's registrant contact names you or the business, with your email, not the web designer's.
- If someone else holds it, ask for the account, not the access. "Can you give me access?" gets you a login to their account, which ends when they do. Ask instead: "Please move the domain into my own account, in my name."
- If they have vanished, talk to the registrar. Changing who a domain is registered to goes through the registrar, and normally needs the current registrant to confirm it. Without them, you will have to prove to the registrar that you are the rightful holder, so gather what shows the business is yours.
Step 3: the WordPress admin
In WordPress, an Administrator is somebody who has access to all the administration features of the site. You want to be one, under your own name and email, not using a login someone else made.
- Log in and open Users. At the top of the list, click Administrator. These are the people with full control.
- Look at the email next to each one. In the film, both administrators belong to the developer.
- Add yourself. Click Add User. Type a username, your own email address, your name, and set Role to Administrator. Click Add User. You now have your own Administrator login.
- Check the Administration Email Address. Open Settings → General. This address gets the site's admin notifications, including WordPress's recovery-mode and critical-error emails. Put your own address in and click Save Changes. WordPress sends a confirmation email to the new address, and the change only takes effect once you click the link in it.
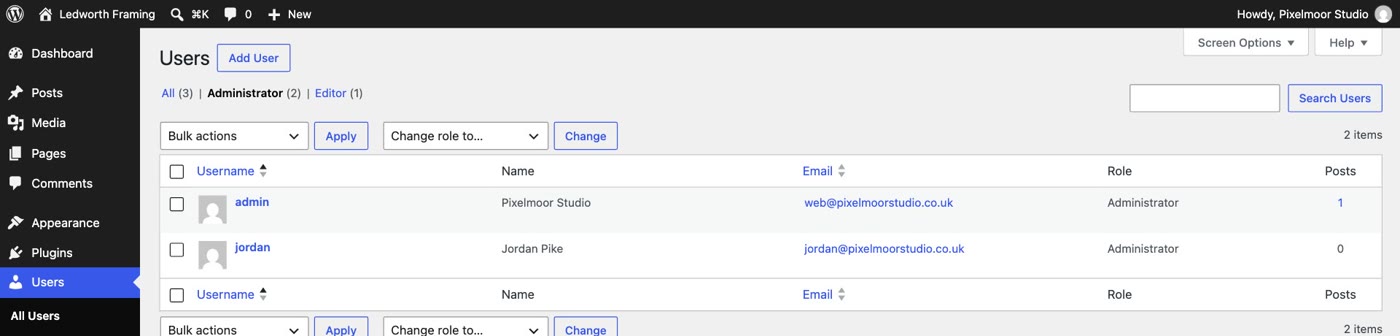
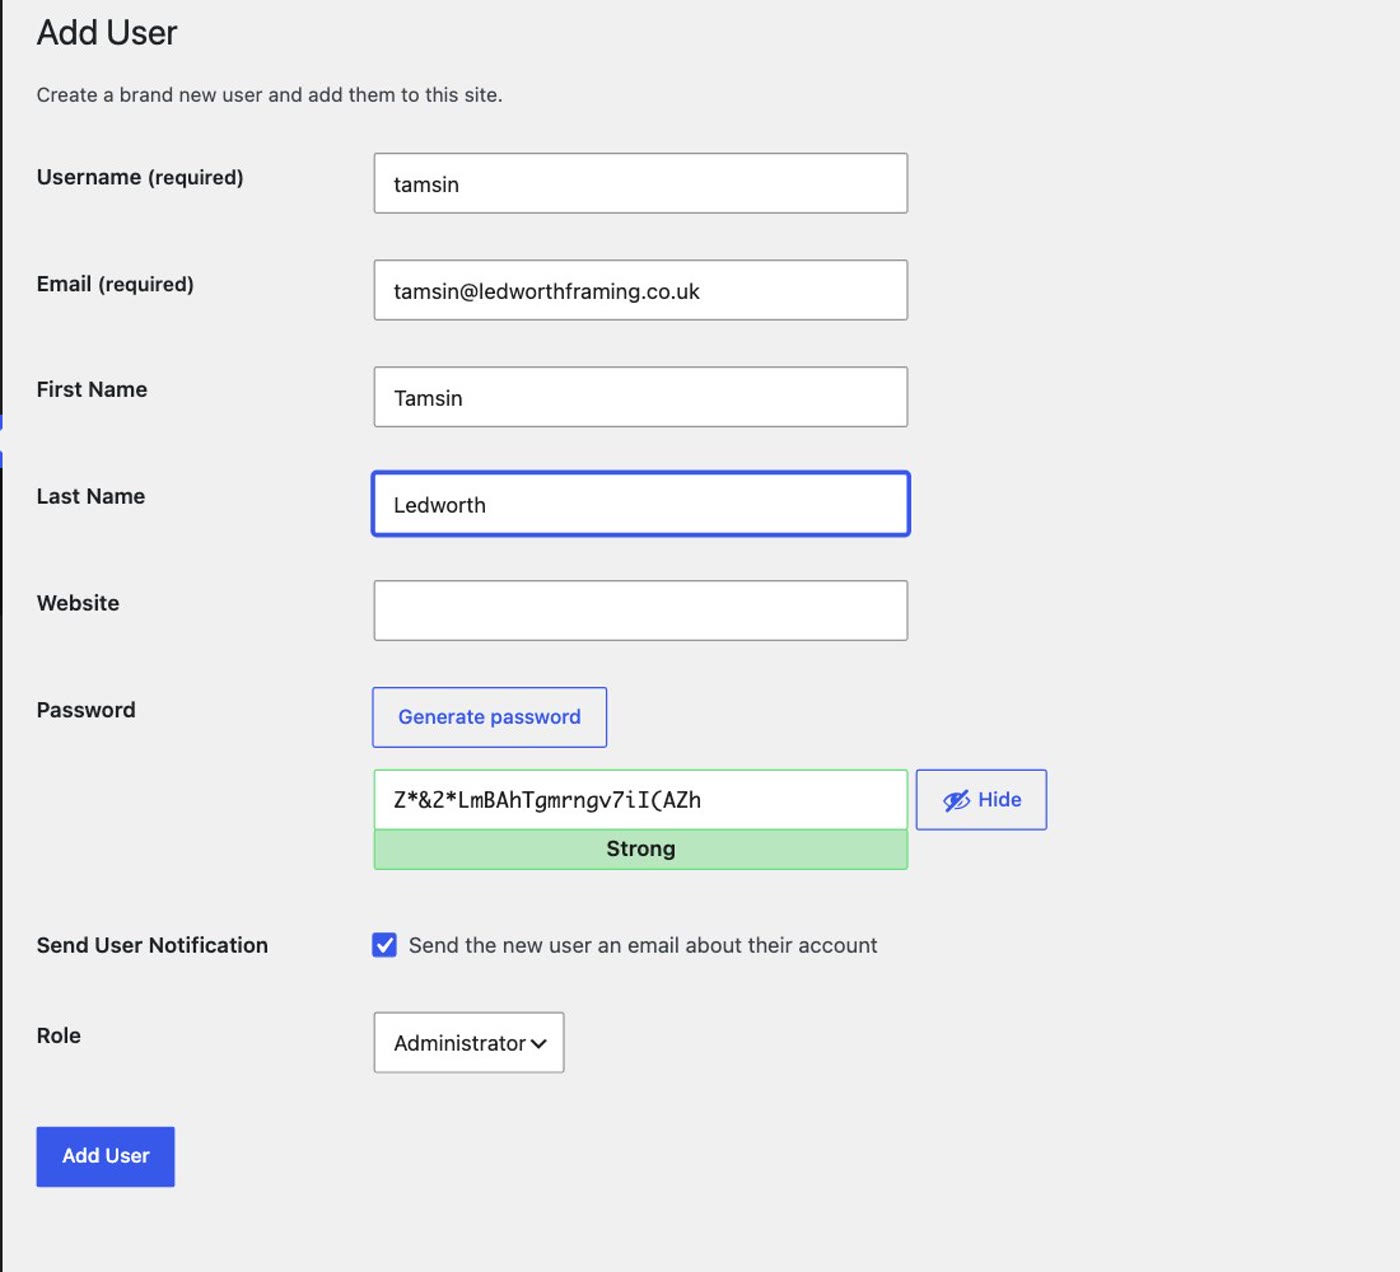

Once you are an Administrator, don't delete the other accounts in a hurry. If you don't recognise one, or it belongs to someone who has gone, ask about it first; if the site still has a developer, they may need access to finish work for you.
Step 4: the hosting account
The host is the company the site's files live with, and it is often not the registrar. Find out who it is and who pays.
- Follow the money. Your card statement or the invoices name the hosting company. If you have never paid a host, someone else has.
- Make sure you can log in. The account's login email should be an address you read.
- Make sure the billing is yours. The invoices are addressed to you or your business, and the card on file is yours, so the site doesn't go dark when somebody else's card expires.
Step 5: your email
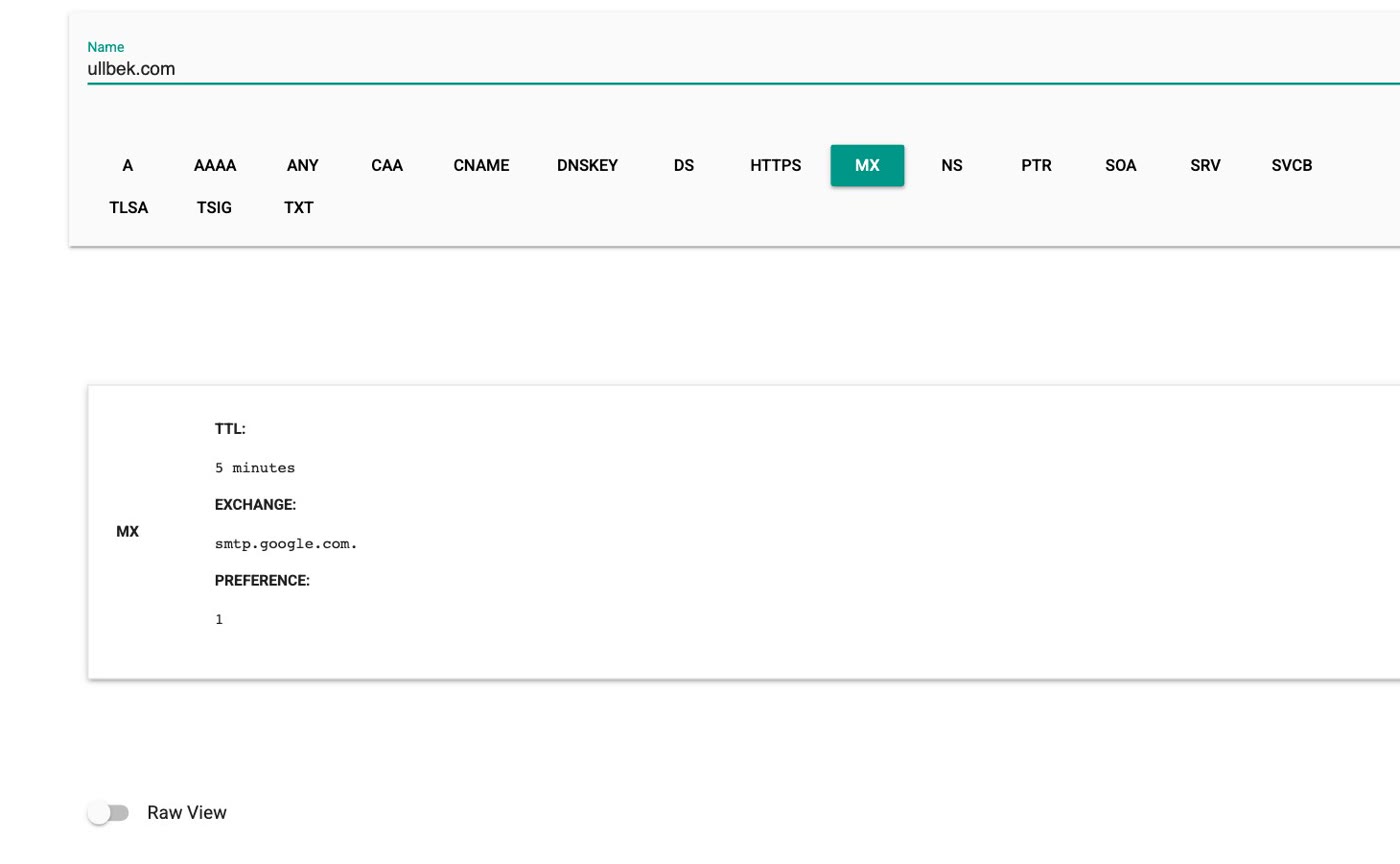
If you have addresses at your own domain, like hello@yourbusiness.co.uk, they are run by some company: Google, Microsoft, your host or your registrar. Your domain's MX records say which mail servers receive your email, and you can read them yourself.
- Open Google's Admin Toolbox Dig (
toolbox.), choose MX and type your domain.googleapps. com/ apps/ dig - Read the answer. The server names tell you who runs your email: in the film,
smtp.google.commeans Google. - Check that account and its bill are in your name too. Email is the key people forget until the day the hosting is cancelled and their inbox goes with it.
Write these five down today
- Domain: the registrar's name and the expiry date.
- Registrar account: in your name, with your email; you are the registrant.
- WordPress: your own Administrator login, and your address as the Administration Email Address.
- Hosting: the company, your login, and invoices in your name.
- Email: who runs it, and who pays for it.
Keep the logins somewhere safe, like a password manager. It is far easier to sort out now than after someone has gone.
- Step 1: look up your domain at
lookup.icann.org; note the registrar and the expiry date. - Step 2: log in at the registrar; the account and the registrant should be you. If not, ask to have the domain moved into your own account.
- Step 3: in WordPress, Users → Administrator; add yourself as an Administrator; set Settings → General → Administration Email Address to yours.
- Step 4: find the host from your card statement or invoices; your login, your billing.
- Step 5: an MX lookup tells you who runs your email; that account and its bill should be yours.
Or, there is another way
Five keys, five companies, and a list to keep up to date. There is a simpler arrangement.
Ullbek is an AI website builder. You give it your WordPress site's address, and it builds a new, custom website from your pages and photos, in your own account from day one. You hold the account: your words and your photos are always there to see in the site's Files panel, and the free .ullbek.site address it publishes on never expires. There is no one in the middle holding the keys. When something needs to change, you say what should be different, and it's done.
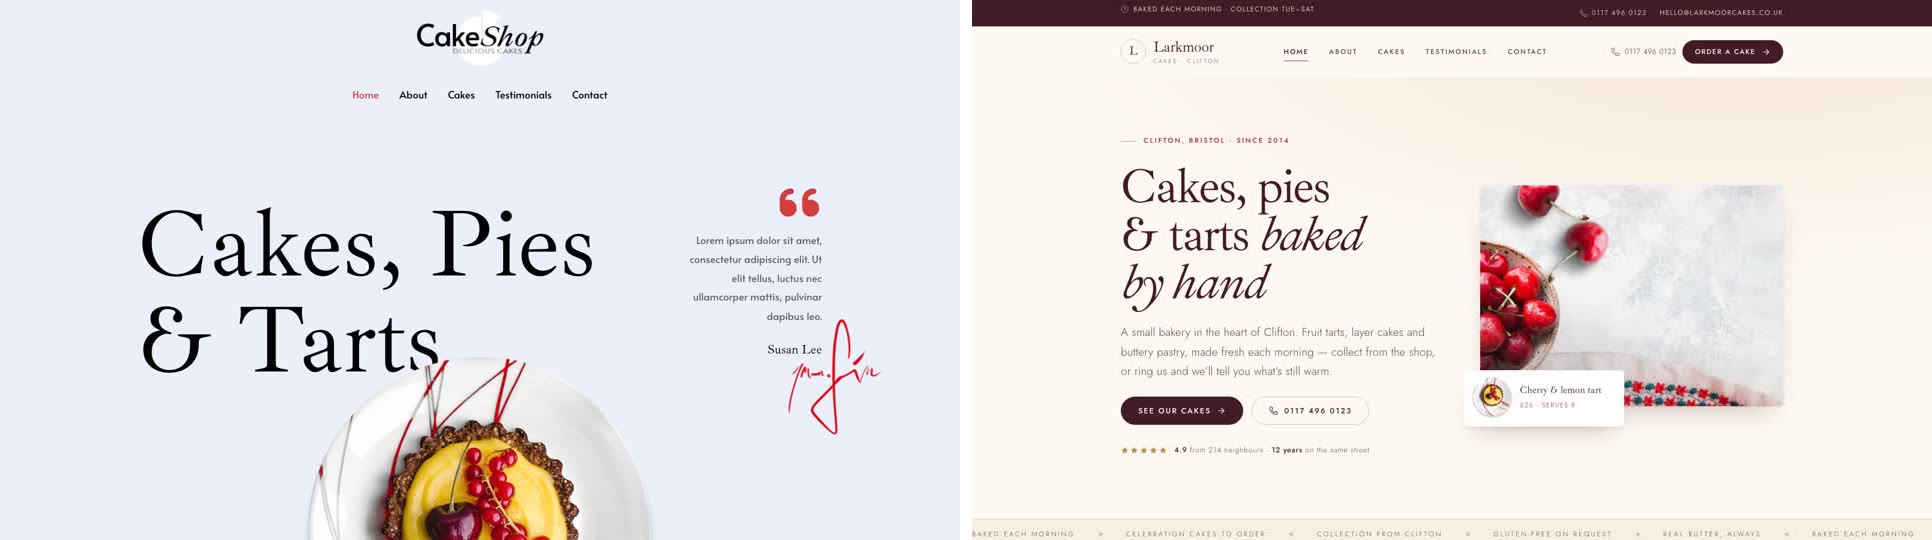
- Give it your old site's address. "Rebuild [your address] as a new site. It's my current WordPress website. Keep every page and bring across the photos." It reads every page and downloads your pictures.
- Answer a few questions in one go. Usually the business name, what to do with any placeholder text, and your real contact details.
- Look it over, publish, then connect your domain. Your domain stays registered where it is (step 1 and 2 above are how you make sure it's yours), and Ullbek gives you the records to add and checks them for you. The move guide walks through every step, starting with getting your keys.
Hold your own keys
See how moving a WordPress site to Ullbek works, step by step.